Microsoft has introduced a feature ‘Message Tracking Log’ that is also brought forward in Exchange 2013 over its predecessor but with some new features. The purpose of Message Tracking Log is to keep record of the entire message that is transferred on servers.
This tracking is used to track message for forensics use & also in case of troubleshooting.For Message tracking log, Set-TransportService or Set-MailboxServer command can be used.This Transport service & mailboxes command can be used to do certain changes that are as follows:
• For enabling or disabling Message Tracking features.
• For specifying the location of the log files.
• Also for specifying the size of a particular log files or the size of the whole directory containing all the log files.
• Age limit can also be specified but the default age is 30 days.
• One important thing is you can enable or disable the Message subject in the log files.
So, here in this we’ll see the Message Tracking Log feature in Exchange 2013.
Prerequisites
As we are going to use administrator, certain permissions will be required. So, below are the RBAC permissions that will be required before starting the task.
• Records Management
• Recipient Management
• Organization Management
Let’s take an example where we explore the feature of Message Tracking.
Here in this Scenario, we have sent some mails before tracking it. Now follow the simple steps.
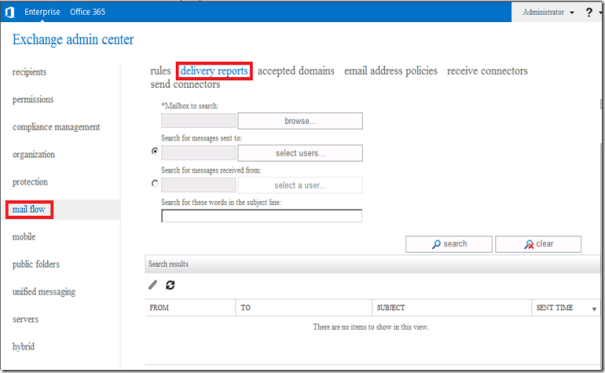
Step 1: First of all login into the Exchange Admin Center (EAC). Here select the ‘mail flow’ in the left panel.
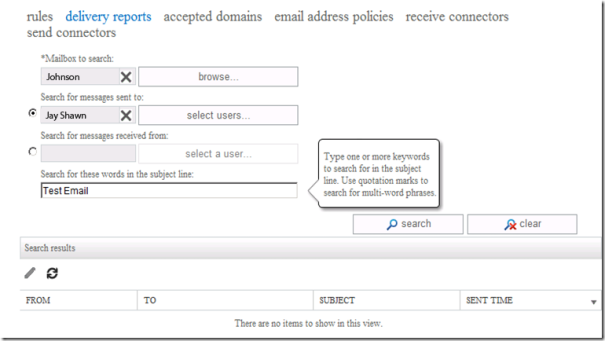
Step 2: In ‘mail flow’ go to delivery reports >> search for messages sent to & select mailbox of a user you search first.
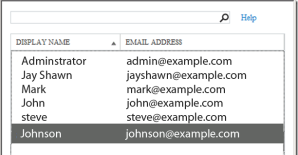
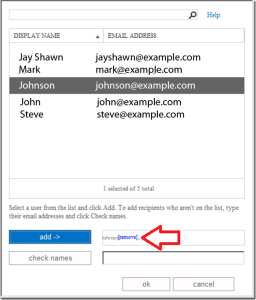
Step 3: In the above figure you will see a user mailbox is selected for search. You can also select multiple user mailboxes.
Step 4: One more option is there i.e., ‘Search for these words in the subject line’. Here you can type one or more keywords to search for in the subject line. You can also search for multi-word phrases.
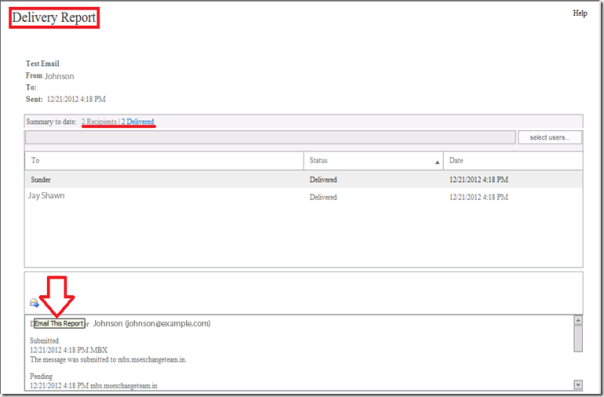
Step 5: As you click on search option, the search result for your queries will be shown. Just double click on it to expand the report.
Step 6: Here you can see the delivery report. Go to the bottom of the window & you will see ‘Email This Report’. Click on it to send the report.
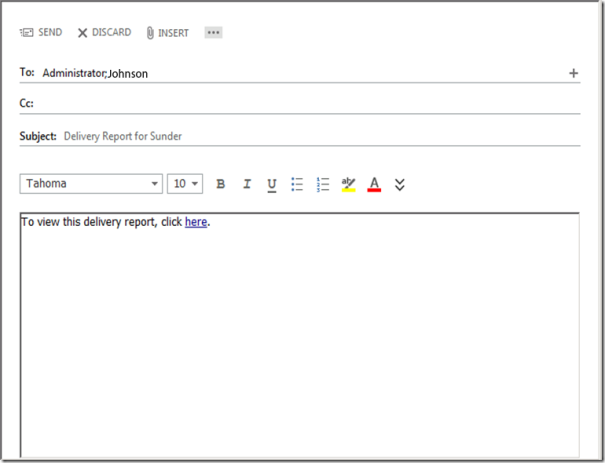
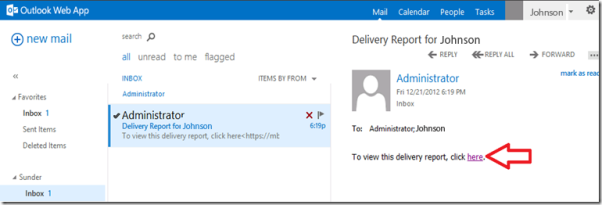
Step 7: As you click on email this report, OWA will open with an attachment of report. You can also view this report by clicking on the option ‘click here’ as shown below. After completing all the section click on ‘Send’ option at the top of the window.
Step 8: Clicking on send option will send the report to the recipient that you have mentioned earlier. Here in OWA, you will see that the report is sent to the administrator.
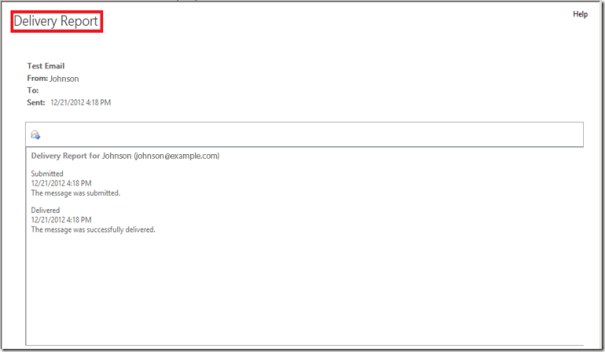
Step 9: Now you have the Delivery Reports. You can also send it if the user request for the report.
Here, you can see the delivery report is very clear & is also user friendly & easy to understand.
Conclusion:
Message Tracking Log is an efficient feature of an Exchange server for tracking message log within an organisation. Also, this method is very much useful in the case of civil litigation to collect evidences for presenting in the court of law & also in cases of troubleshooting.


Leave a comment